With the repairs done, and the finish applied, it was time to fit the new (old) period handles.
Matches very well!
As you can see the handles worked out very well. The repairs also quite good! A little hard to match perfectly in some areas however overall I’m very happy, a huge improve on the original handles.
Continuing on from my last post, the repairs to the 1950’s bedsides have been completed.
Almost done!
I was reasonably happy with how the veneer patching turned out. Once the glue dried, I dotted the fresh veneer with a dark stain (walnut) to help give it a little colour, and after a light sand, I again spotted the repairs with a varnish/thinner mixture to build it up a little. It was after this I then realised I wasn’t happy with the overall finish on the door and drawer fronts. Cue some 240 grit wet and dry. This smoothed out the original finish, and gave a good base to then apply 2 final coats of the varnish/thinner mixture.
Polished and ready to fit.
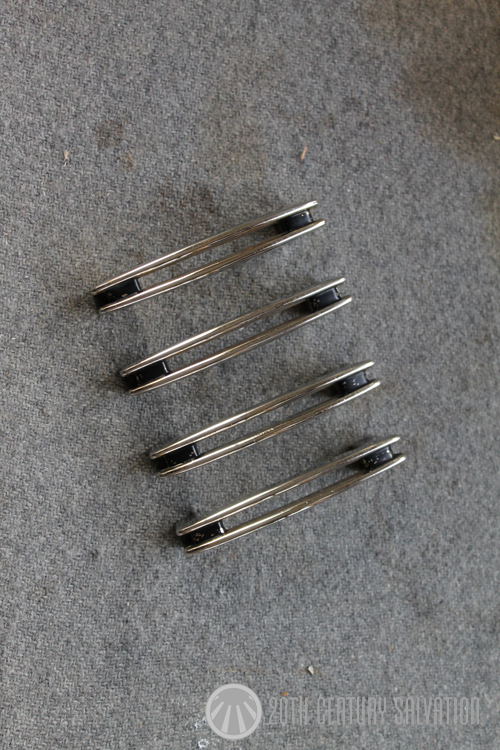
With the repairs done, it was time to polish the new (old) door and drawer handles in preparation for fitting!
I came across this neat little set of bedside tables on the weekend. Ever popular, and judging by the style, I’d imagine they date from the 1950’s. Cube shaped, and sitting atop a 4 legged base, the compartments comprise of a single drawer and cupboard space.
45 degree chamfered edges
It looks like they’ve previously had a refurbish, and unfortunately the handle choice leaves a little………or a lot to be desired! Just not the correct style for the piece. Luckily I was able to find 4 period specific matching handles that should look quite good. More on those next post.
Super fine cut and paste!
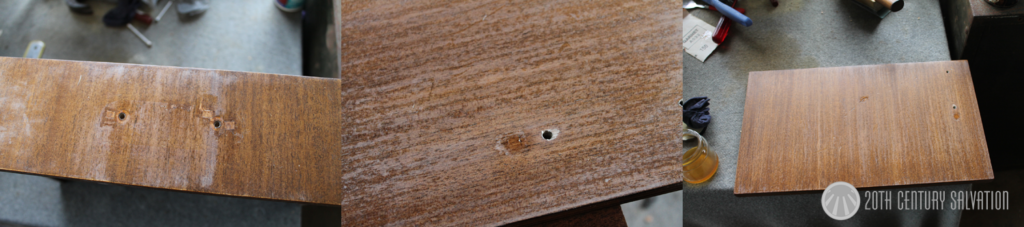
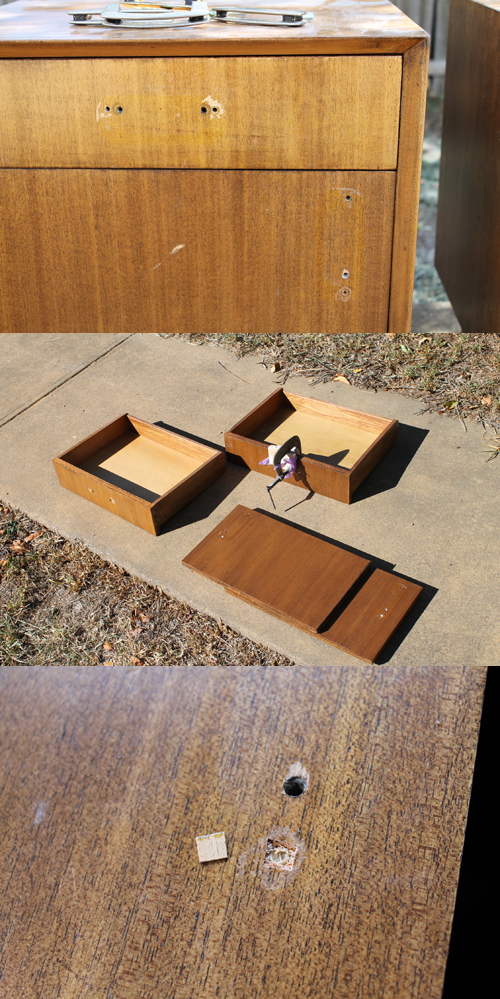
Now for the fun part. The current handles had to have 2 extra holes drilled in each drawer, and 1 extra in each cupboard door because the centres for the screw holes were wider apart than the original handles (6 holes in total to patch). Secondly, whilst removing the handles, they removed some of the finish and stain due to whatever glue they used to attach them. Double Whammy! Thanks for coming! LOL. All good, I’ll sort it!
I started off by glueing some 6mm dowel pieces in place of the old handle screw holes. This will help give a solid backing to the small pieces of maple veneer I’ll cut and paste. A super sharp razor blade and small rule then helped to size the veneer up perfectly which was ‘borrowed’ from the rear/bottom of the drawer fascia. It should mean that once I’ve reapplied some stain, it will match very well. Fingers crossed of course!
Lucky enough to come across a great matching set of Parker Nordic bedsides.
Condition was pretty good, however the leg on one had a previous repair which wasn’t quite up to standard, there was also a nasty gouge to the top edge and a small chip to the veneer on one drawer front.
Leg repair!Solid Timber Repair!Veneer repair!
With all repairs carried out, the original finish was given a light go over with some super fine steel wool, and then 2 coats of an oil/mineral turpentine mixture was applied.
Finished!
Very happy with the end results! The bedsides will be available in the online shop with the matching bed head very soon.