Tag Archives: 1960’s

Space Age Coffee Table Restoration Update # 2

Busy day today with a good amount of progress. Continuation from yesterdays post below

STEP 3

I was now able to start on the sanding with all the pieces repaired/re-manufactured. Because all of the pieces were coated in the original varnish/shellac finish I started off using some 60 grit sandpaper on my orbital sander. This grit is quite rough but made quick work on the original coating. Once all the pieces were done I moved onto some 150 grit paper. Repeated the process for all pieces and then moved onto some 320 grit paper for the finishing sand. All came up quite nicely as you can see below.

Sanded pieces of a 1960's Coffee Table

STEP 4

With all the pieces of the coffee table now repaired and sanded I started on the reassembly. A fairly straight forward job as all the holes are pre-existing and lined up quite easily. Glued and screwed the legs to the mounting blocks to provide extra stability.

1960's Coffee Table restoration project

You can see that classic space age design appearing again.

STEP 5

With the coffee table now reassembled it’s time to apply a finish. The original finish was a golden oak colour with a shellac/varnish applied over the top. I’m going to go for a darker  (teak colour) oiled finish. I think it will complement the darker teak colours of the retro lounge suites and sideboards it will share it’s space with.

I’ve had quite good success with previous pieces I have restored using a mix of Linseed Oil, Teak Stain and Turps in a 2:1:1 ratio. The reason I add the Teak stain in there is because Victorian Ash in its raw form is a very light coloured timber (white to almost pink) so the stain adds a nice Teak colour to it.

After mixing the 3 elements in my mixing container (lol) I simply apply the finish using a soft cotton cloth. I will reapply the finish 4-5 times letting each coat dry before re-applying. The great thing about having the Linseed Oil mixed in is that once the finish has been applied, that’s it! No need to re-oil over the stain.

Here’s a sneak peak at how its coming along after 2 coats this afternoon.

The applying of an oil based finish to a retro coffee table

Keep an eye out for the finished product next week!

Space Age Coffee Table Restoration Update

I made a start today on the restoration of the Space Age Coffee table I previewed on the blog last week. I’m going to go into a little bit more detail on the steps I normally take when restoring an item and how I go about it. Hopefully this will give you an insight into what I do, and perhaps even share some idea’s for your own projects!

STEP 1

The first step for me when performing a full restoration on an item of furniture is to disassemble it. This way you can see what’s good, what’s not, and what needs repairing. Its extremely important to take a great deal of care during this stage as often joints are nailed, screwed, or glued together. If you miss a screw and you start bashing to get it apart you can seriously damage the piece.

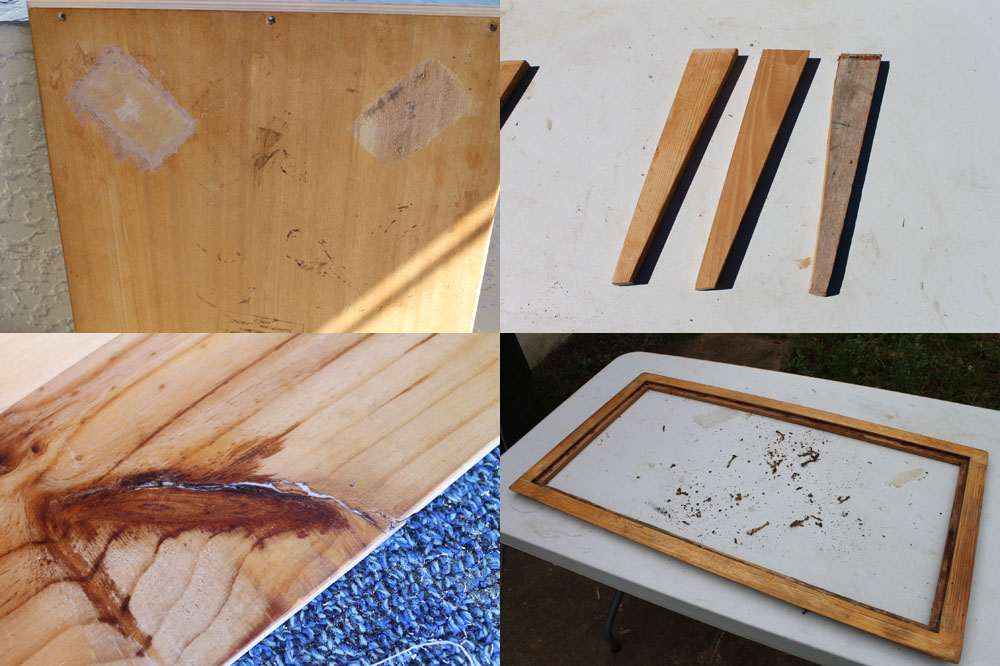
With the Coffee Table I was relatively lucky. The Table top and upright supports coming up off the base were only screwed. The triangular support had 2 nails in it and the glue for that joint was old and brittle so it came apart easily. The hardest part was removing the 4 legs from the underside of the base. These were screwed, and glued. What made it tricky is that the base is a veneer, so I had to gently use a chisel to lever the mounting blocks with legs attached up from the surface. 2 came up easily. 2 did not and took a bit more effort to remove along with damaging a small amount of veneer surface under the mounting block.

Space Age Design Coffee Table 1960's

STEP 2

With the coffee table in pieces (note I am leaving the table top an drawer assembled as they are in good solid condition and easy to work with in their current state) the next step is to assess all the pieces, and see what needs to be repaired/replaced.

With the coffee table I had to –

  • Completely re-manufacture one leg.
  • Repair the damaged veneer to the underside of the base (this will be hidden once the legs and mounting blocks are re-attached).
  • Pump some wood glue into a crack in the side of the drawer to strengthen it up.
  • Putty up a few small nicks.
  • Clean the years of food and grime built up inside the coffee table top edge.
1960's Space Age Design Coffee Table

Tomorrow I’ll be tackling the sanding and re-assembly .

Next restoration project is ready for Blast Off!

With the restoration of the Parker chair complete I thought I’d share a few photos of my next project.

This Victorian Ash coffee table has a real space age design to it with it’s lunar landing craft style legs and half floating table top due to a clever triangular design supporting piece hidden away under the centre of the table top.

Unfortunately this coffee table has seen better days. The top is caked with food build up (yuk!), scratches to the painted underside of the glass top, various stains to the finish, one leg has been replaced with a not so matching piece and the draw doesn’t quite slide correctly.

With all restoration projects you need to weigh up whether or not the amount of time and effort you put into a piece will be worth the end result. Sometimes not, so you will pass on the piece or approach it in a different way – aka – http://www.stillbroke.com.au/blog/2012/03/21/mirror-mirror-on-the-wall/

This one however for me ticks all the boxes needed to perform a restoration. We have –

  • Great Design and Shape (Most important)
  • Maker’s label underneath (Help to identify the piece when planning to sell)
  • Easy materials to work with (Being made of timber)

Looking forward to making a start on it!

Retro 1960's Coffee Table

Retro Rainbow Colours

Being an ‘Ozbarginer’ – http://www.ozbargain.com.au/ I often spend too much time refreshing their main page hoping to get on the next great deal!

When 8 rechargeable eneloop batteries for $19.99 delivered came up the other week it was too good of a deal to pass up so I brought them. They’ll come in handy for testing out old toys, handheld video games and the like!

Upon receiving my package I eagerly opened it up, and was surprised to see how closely the colours of the 2012 manufactured batteries (5th anniversary addition) matched a set of 1960’s retro anodised cups I have.

Retro Colours


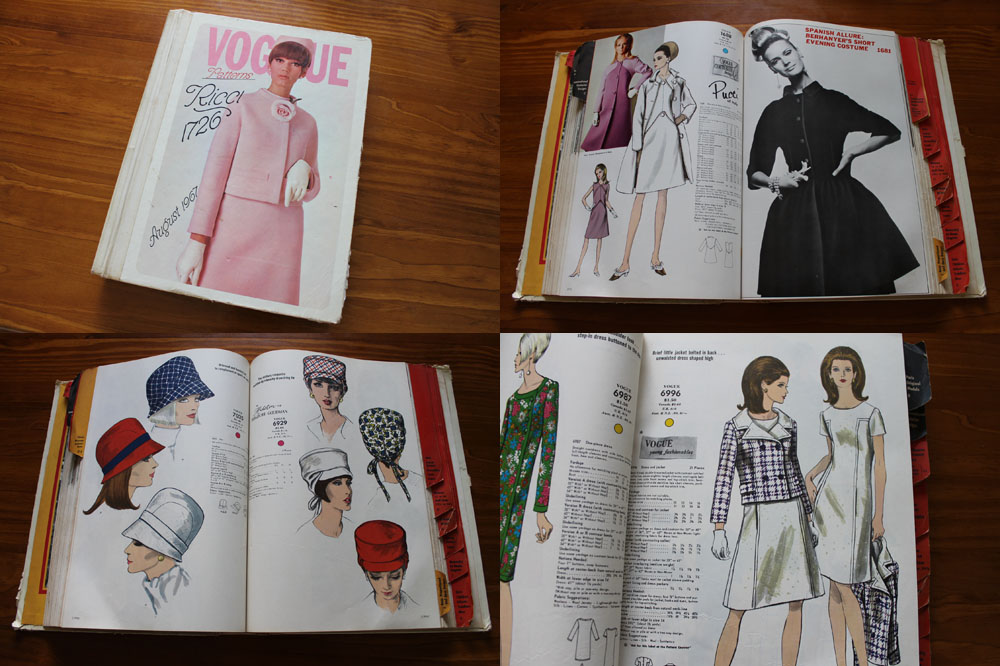
Retro 1960’s VOGUE Pattern Book

Check out this retro 1960’s VOGUE pattern book I came across the other day. Full of patterns from some of VOGUE’s biggest designers inclduing Jo Mattli, Givenchy, Grès and Christian Dior to name a few.

Now I would say I’m not hugely into women’s fashion, however this definitely is a very cool piece, with hundreds of brightly illustrated designs from an era that broke many fashion traditions.

Retro Clothing Pattern book