As I mentioned a few weeks ago I was fortunate enough to come across a magazine rack in an antique store whilst on holidays which was extremely similar to the one I been restoring, however this one was a slightly modified version, being a combination between magazine rack/coffee table and standing lamp.
Retro magazine rack
It was great to see another one floating around (although slightly different). I previously mentioned about researching what the original divider would of looked like, and ended up coming up with my own variation after my research failed to shed any light on it (which in my opinion kicks ass compared to the boring, rectangular shape divider used in the original). It was also handy to see the original fastening method of the frame to the central rack.
Coffee table/magazine rack/standing lamp
Would you believe that since then I’ve come across another? Always the way though, never around when you’re looking for one, and plentiful when you’re not.
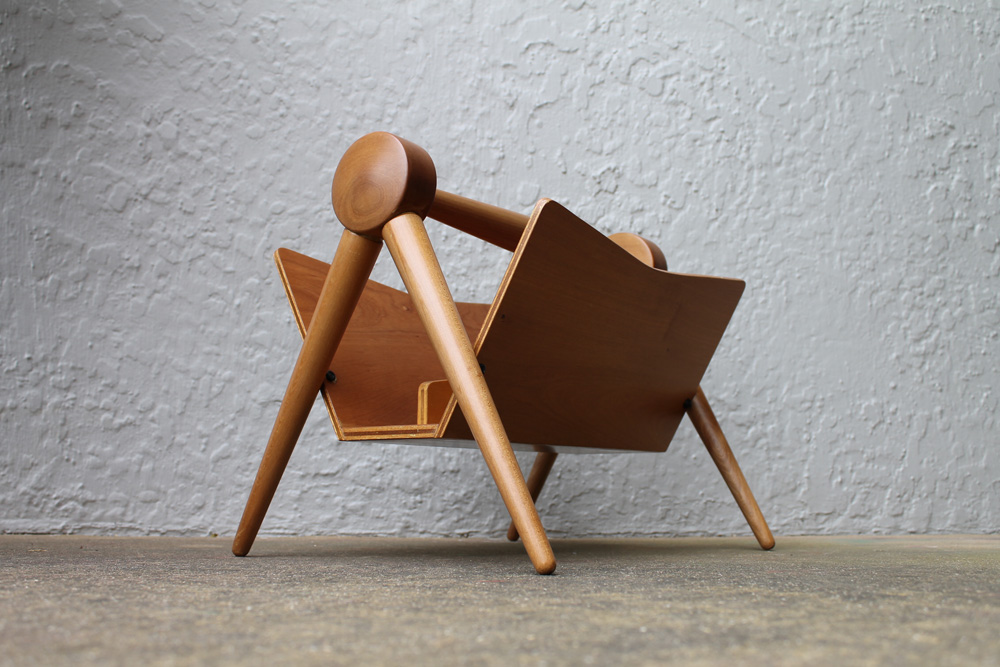
Well, it may of taken a little longer to complete due to holidays but over the weekend I was finally able to get around and complete the Atomic magazine rack i’ve been working on for the past few weeks.
Here it is before –
Atomic magazine rack before photo.
And here it is after –
Images of the completed restoration.
I’m super happy with the end result. The colour, the grain, the shape, the way it sits, all perfect! Now time to find it a spot in our lounge room and admire and appreciate it for awhile…….
Be sure to check back within the next week or so, I’ve got a few pictures of a variation of this exact piece I found in an antique shop whilst on holidays on the north coast a few weeks ago. Very cool and a bit of a spin out!
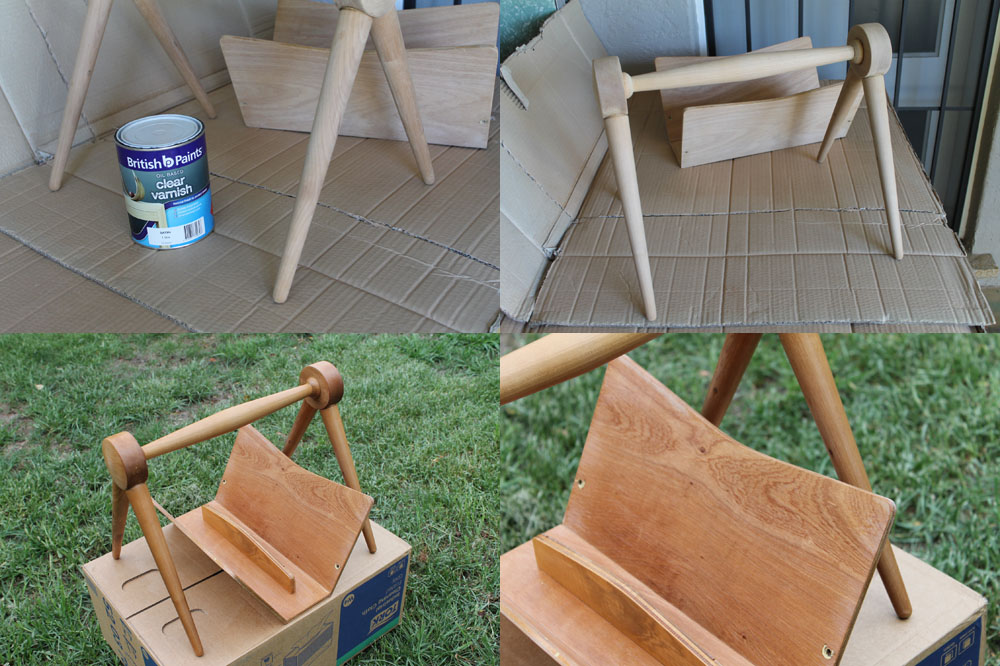
I ended up using a clear varnish for the magazine rack. Being coachwood I thought that this would be a good choice for the finish as it is relatively hard wearing and needing little to no ongoing maintenance.
The clear varnish ending up being a great choice in regards to colour also. The timber colour has changed, however it is very ‘natural’ (hence being a clear) and actually matches a lot of the original shellac finishes on pieces from the same era – more on this in an upcoming blog post.
The first 2 coats were applied with a fine bristle brush with a light sanding in between. I applied the following 2 coats with a spray guy (in the above photo the 4th coat has not yet been applied).
The finish turned out great, and now this process has been completed I can get onto the final assembly making the 2 pieces whole again. May be a little tricky, with some custom brass brackets having to be made………we’ll see.
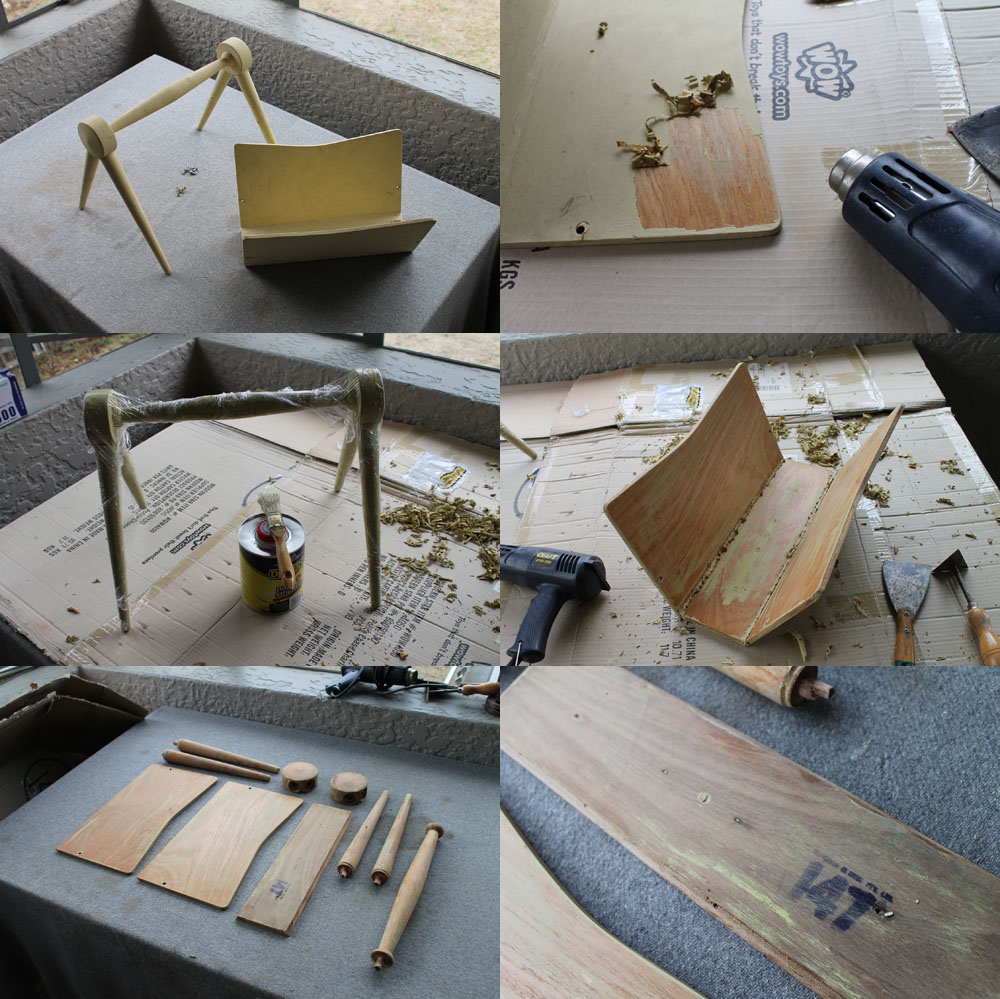
Following on from our previous post here, over the weekend I started to strip the paint off the awesome atomic magazine rack and disassemble it.
For stripping the paint I used a combination of both a heat gun for the straight, flat surfaces and paint stripper for the turned pieces. Although I’m not an overly big fan of using paint stripper it certainly does help on those curved/turned surfaces/edges.
Once the majority of the paint was removed I got down to the disassembly part. The initial stage was easy, 4 bolts & nuts and the rack broke down into 2 pieces. The second stage was a little more time consuming. Old glue, thin veneer and doweled joints all added to the difficulty however after a little persuasion it all came apart.
Update and pictures of an awesome 1950’s magazine rack.
So what was underneath that old paint? Well as I thought the timber is coachwood with the legs and handle solid timber while the rack is plywood.
It’s always interesting to see what you discover whilst restoring. Makers marks, little notes, tricks of the trades all add to the fun. So what did I uncover thus far? Well as you can see on the bottom side of the rack there is the original makers stamp. The name is a little hard to read, however the ‘147’ is clearly visible. This more than likely was their manufacturers # and I’m hoping in time I’ll be able to identify the maker. 4 small nail holes and a dowel hole that has been filled were also found underneath the old paint. Due to the position I’m picturing that there would of been some kind of separating piece of timber that would of stopped the magazines from slipping all the way over to one side, effectively doubling the storage. I’ll have to see if I can find a similar piece online and see how it may of been originally. It should be reasonably easy to knock something up.
Stay tuned, repairs and preparation for reassembly next post!
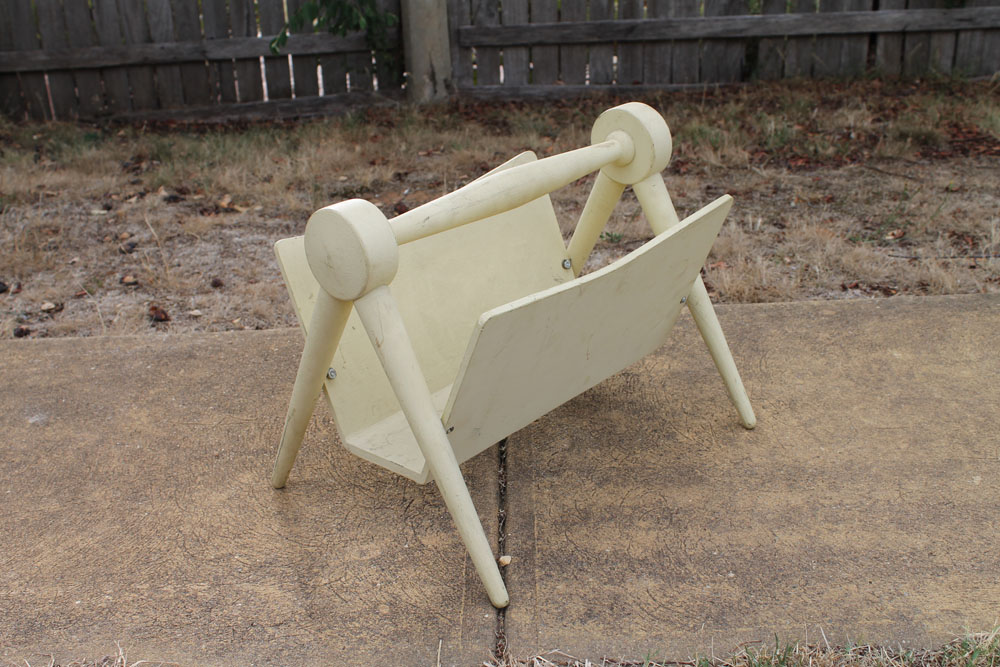
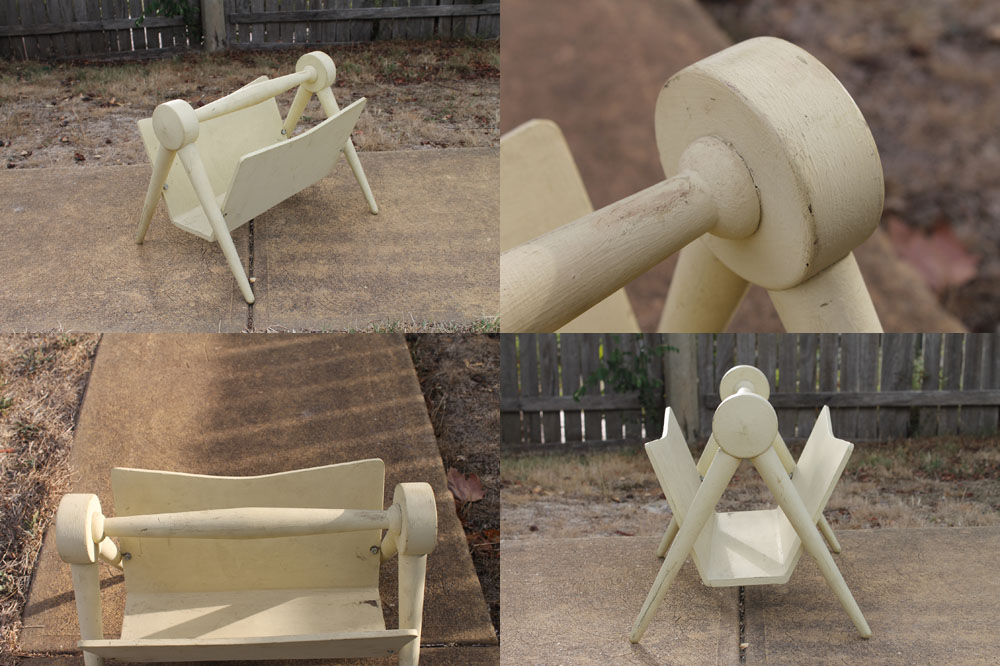
I came across this magazine rack on the Australia day long weekend. Tucked away in the storage area of a vintage homeware shop its pokey legs and cotton reel style handle caught my eye immediately. I had to have it! So after striking a deal with the shopkeep away I whisked it.
Awesome 1950’s magazine rack
Now although it may not be in the best condition, it will be a fairly straight forward restoration.
I’m thinking that the timber under the thick cream paint will be coachwood. Legs and handle will be solid timber while the magazine rack will be a plywood. The rack has also has been modified with some modern screws which will need to be replaced with suitable replacements.
First off, stripping that paint. Still deciding whether to trial a natural paint stripped, or use the heat gun. Time will tell.
Check out this neat little Art Deco magazine rack. Incorporating a nickel/chrome plate frame, rosewood handle the rack also uses vinyl to tie the whole piece together.
The structure of Art Deco is based on mathematical geometric shapes, can you pick the 3 that were used in this design?