Category Archives: Restoration Projects

Category for items that will be/have been restored.

Restoration Complete – Atomic Magazine Rack

Well, it may of taken a little longer to complete due to holidays but over the weekend I was finally able to get around and complete the Atomic magazine rack i’ve been working on for the past few weeks.

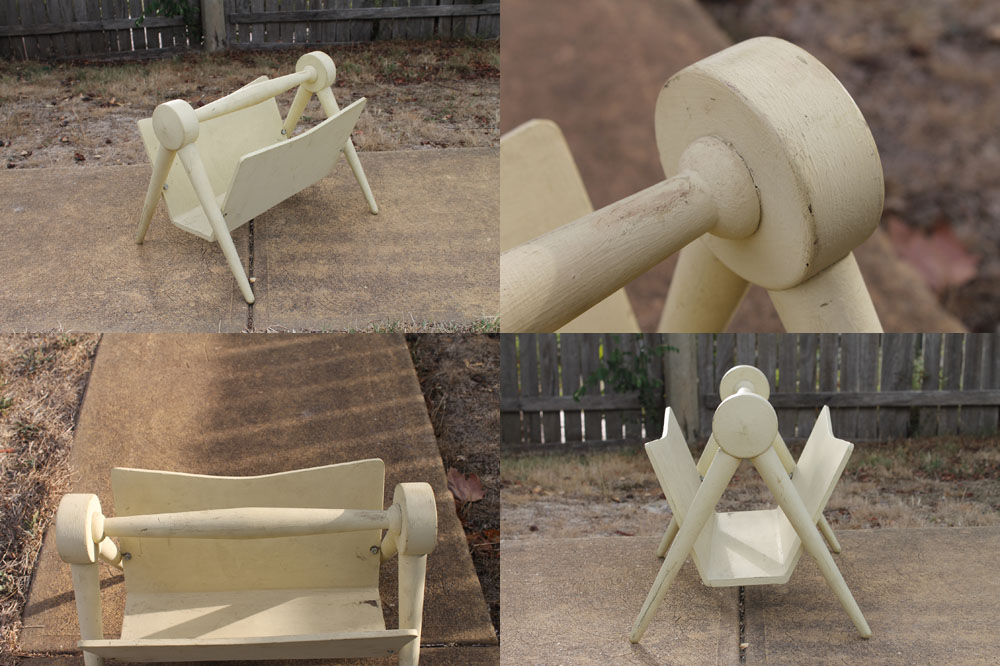
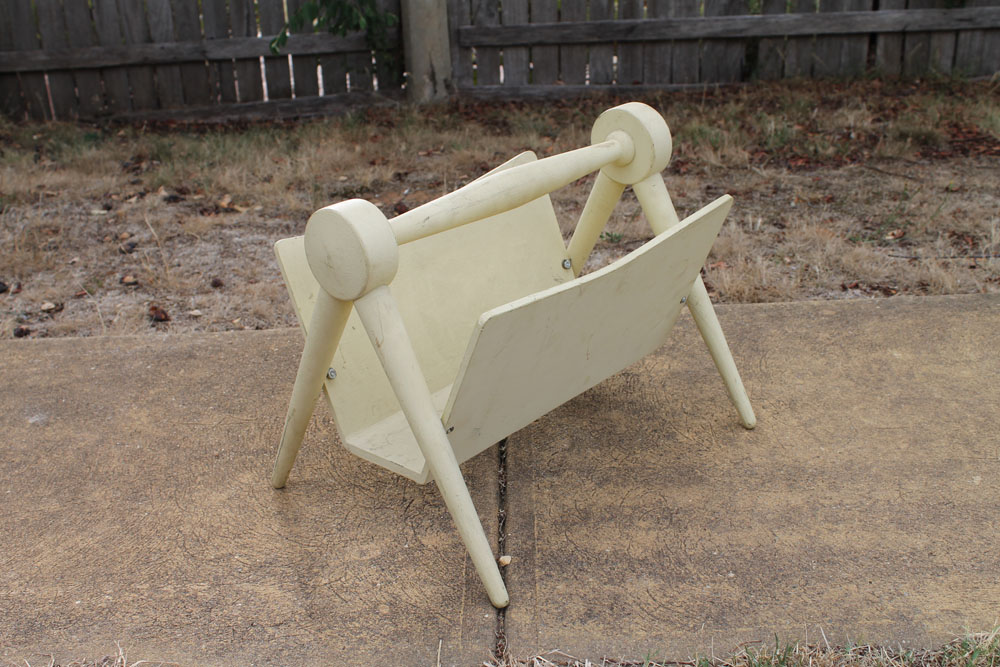
Here it is before –

Imags of a mid century magazine rack
Atomic magazine rack before photo.

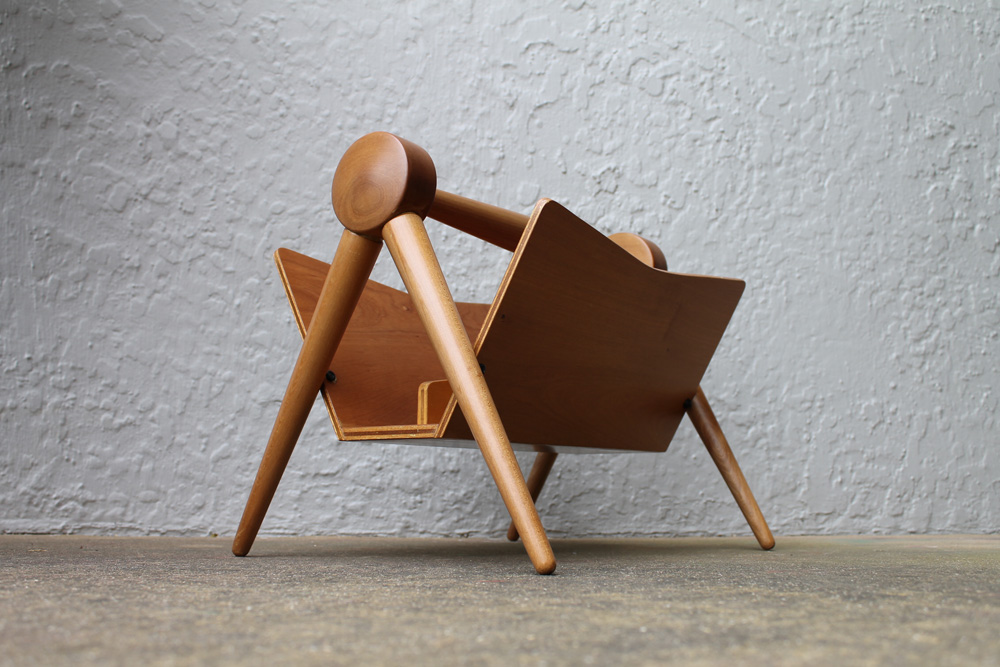
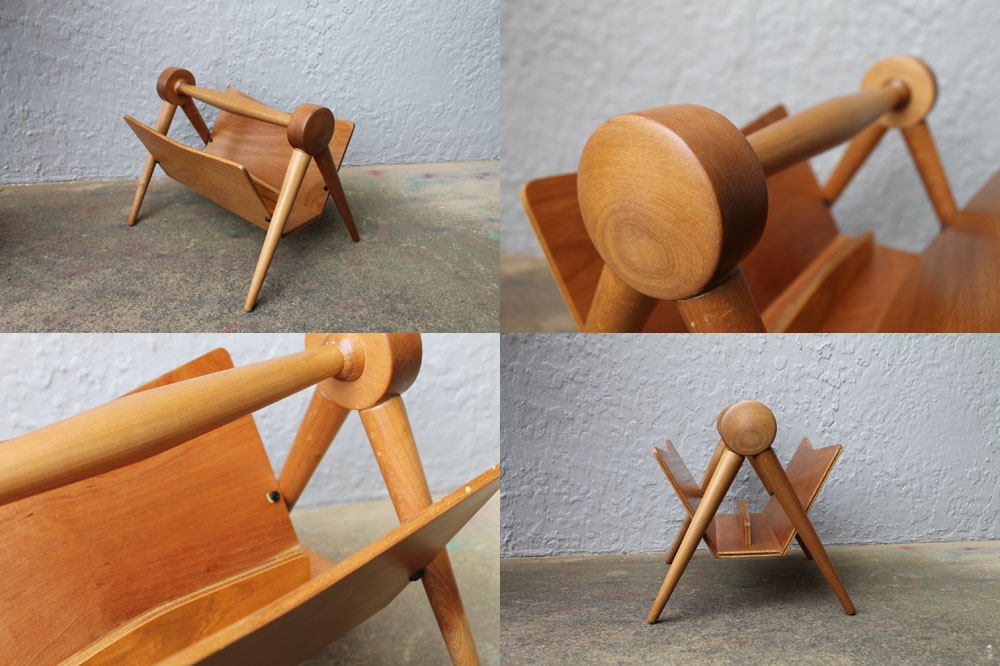
And here it is after –

Atomic Magazine Rack
Images of the completed restoration.

I’m super happy with the end result. The colour, the grain, the shape, the way it sits, all perfect! Now time to find it a spot in our lounge room and admire and appreciate it for awhile…….

Be sure to check back within the next week or so, I’ve got a few pictures of a variation of this exact piece I found in an antique shop whilst on holidays on the north coast a few weeks ago. Very cool and a bit of a spin out!

Complete Restoration Mid Century
Super cool atomic styled magazine rack.

Atomic Magazine Rack – Timber Finish

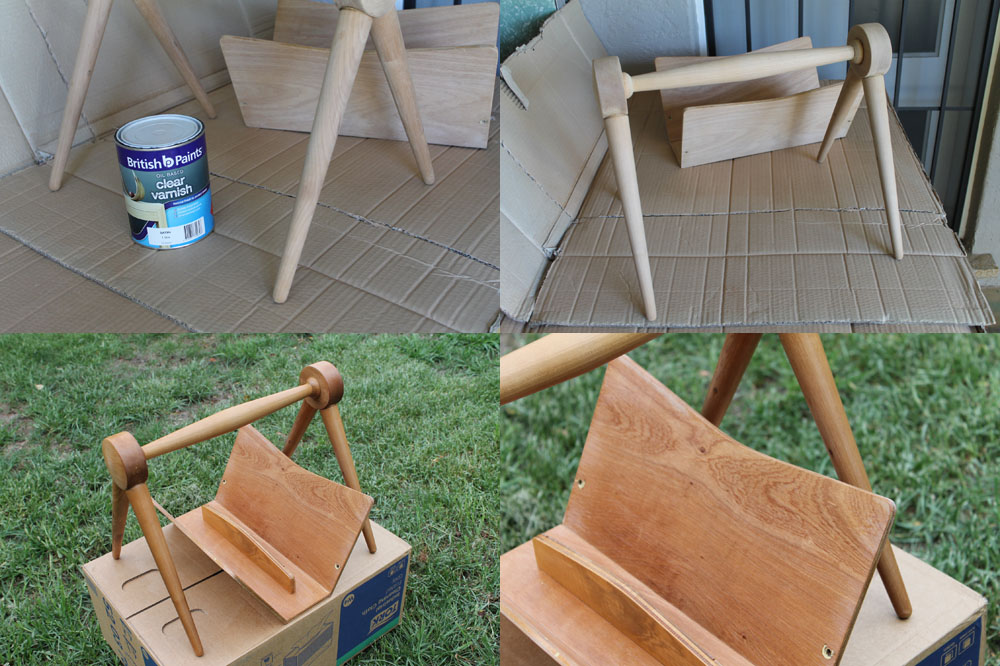
Now for the timber finish!

Varnish applied to Mid Century Furniture
Timber finish for restoration project.

I ended up using a clear varnish for the magazine rack. Being coachwood I thought that this would be a good choice for the finish as it is relatively hard wearing and needing little to no ongoing maintenance.

The clear varnish ending up being a great choice in regards to colour also. The timber colour has changed, however it is very ‘natural’ (hence being a clear) and actually matches a lot of the original shellac finishes on pieces from the same era – more on this in an upcoming blog post.

The first 2 coats were applied with a fine bristle brush with a light sanding in between. I applied the following 2 coats with a spray guy (in the above photo the 4th coat has not yet been applied).

The finish turned out great, and now this process has been completed I can get onto the final assembly making the 2 pieces whole again. May be a little tricky, with some custom brass brackets having to be made………we’ll see.

Atomic Magazine Rack Progress – Repairs, Sanding & Assembly

Following on from our last update, we are now ready to sand, repair and assemble our magazine rack.

Updates including pictures of the restoration of a mid century magazine rack.
Progress pictures of an Atomic Magazine Rack restoration.

First was the sanding, and as you can see someone done quite a number on the coachwood veneer hitting it with quite a rough grit sand paper (and in all directions) to help their paint ‘stick’ to the timber. Luckily all of the scratches were able to be sanded out without damaging the thin veneer.

Updates including pictures of the restoration of a mid century magazine rack.
Progress pictures of an Atomic Magazine Rack restoration.

Next came the repairs, and to be honest there were a few more than I was originally expecting. Various old screw holes were filled, lifting veneer on some edges re-glued, 2 edges were trimmed (at a 60 degree angle) down to give a nice straight edge along with manufacturing the missing centre divider.

As you can see above the centre divider has a slight curve (boomerang shaped) to one edge. This curve is very sympathetic to the piece (and the era it was made in) and is simply the exact reverse of  the angle on the 2 sides of the magazine rack.

Updates including pictures of the restoration of a mid century magazine rack.
Progress pictures of an Atomic Magazine Rack restoration.

After the repairs all pieces were given a quick hit with some finishing sand paper and then re-assembled into the 2 main pieces. The legs/handle and the rack. This was done in a few stages to ensure each individual piece went together and set correctly.

So far, so good, and we are almost there. Next update will comprise of timber finishing and final reassembly. Can’t wait!

Atomic Magazine Rack – Paint Removal & Disassembly

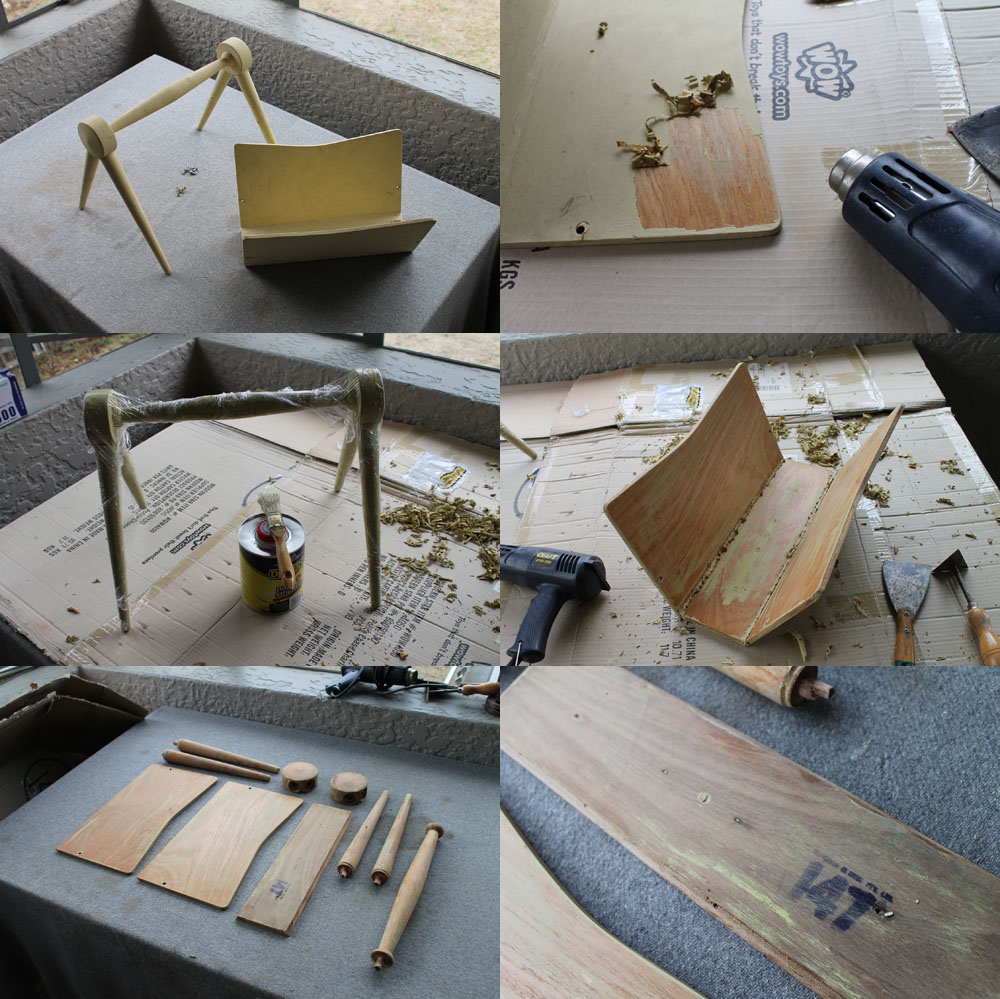
Following on from our previous post here, over the weekend I started to strip the paint off the awesome atomic magazine rack and disassemble it.

For stripping the paint I used a combination of both a heat gun for the straight, flat surfaces and paint stripper for the turned pieces. Although I’m not an overly  big fan of using paint stripper it certainly does help on those curved/turned surfaces/edges.

Once the majority of the paint was removed I got down to the disassembly part. The initial stage was easy, 4 bolts & nuts and the rack broke down into 2 pieces. The second stage was a little more time consuming. Old glue, thin veneer and doweled joints all added to the difficulty however after a little persuasion it all came apart.

Mid Century Magazine Rack
Update and pictures of an awesome 1950’s magazine rack.

So what was underneath that old paint? Well as I thought the timber is coachwood with the legs and handle solid timber while the rack is plywood.

It’s always interesting to see what you discover whilst restoring. Makers marks, little notes, tricks of the trades all add to the fun. So what did I uncover thus far? Well as you can see on the bottom side of the rack there is the original makers stamp. The name is a little hard to read, however the ‘147’ is clearly visible. This more than likely was their manufacturers # and I’m hoping in time I’ll be able to identify the maker. 4 small nail holes and a dowel hole that has been filled were also found underneath the old paint. Due to the position I’m picturing that there would of been some kind of separating piece of timber that would of stopped the magazines from slipping all the way over to one side, effectively doubling the storage. I’ll have to see if I can find a similar piece online and see how it may of been originally. It should be reasonably easy to knock something up.

Stay tuned, repairs and preparation for reassembly next post!

Awesome 1950’s ‘Atomic’ Magazine Rack Restoration

I came across this magazine rack on the Australia day long weekend. Tucked away in the storage area of a vintage homeware shop its pokey legs and cotton reel style handle caught my eye immediately.  I had to have it! So after striking a deal with the shopkeep away I whisked it.

Atomic magazine rack
Awesome 1950’s magazine rack

Now although it may not be in the best condition, it will be a fairly straight forward restoration.

I’m thinking that the timber under the thick cream paint will be coachwood.  Legs and handle will be solid timber while the magazine rack will be a plywood. The rack has also has been modified with some modern screws which will need to be replaced with suitable replacements.

First off, stripping that paint. Still deciding whether to trial a natural paint stripped, or use the heat gun. Time will tell.

I’ll post updates at the next stage.

Sideboard Restoration/Upcycling Complete!

A little over 2 weeks ago I posted about a Sideboard I was in the middle of restoring/upcycling for a customers holiday house on the coast. Since that time the finishing touches were added and today we got around to delivering and setting it up.

I thought I’d take a few before and after pictures to show the difference a functional piece of furniture (being over 60 years old) can make to ANY room in your house. Sometimes we get too caught up in ‘dressing’ up a piece for a photoshoot that we forget it’s original purpose. I mean lets face it, we don’t all have Murano glass, bitossi bulls and period artwork pieces to decorate our sideboards with, so it was extremely refreshing to see just how good the sideboard looked today.

Before

Before picture of a coastal homes lounge room


After

Coastal Lounge Room with Restored Mid Century Sideboard


As you can see, the sideboard fits in perfectly. It does everything a good, functional sideboard/TV unit should, whilst bringing a nice touch of 1950’s design along with it. I really like the combination of materials here, and how they all seem to blend seamlessly into one. We have the original maple veneer/solid timber base, the industrial look pine plywood, the vivid white backs/middle display section and the glass sliding doors/middle display shelf.

The new owners are over the moon and couldn’t be happier with the way everything turned out.

Be sure to get in contact if you are facing a similar situation. We are always happy to discuss ideas and see in what ways we can help!

Sideboard Restoration

A few weeks ago I received a call from a client looking for a sideboard to put in their holiday house down the coast. The brief was pretty simple. Something beachie and light to match a new coat of paint and some freshly discovered floor boards in their lounge room. It’s to house a flat screen TV, DVD player, DVD’s and a few books along with a few small ornaments.

With nothing quite suitable on the site I checked out our storage shed for a piece I had in mind.

Its a 1950’s sideboard, comprising of a laminex top, 4 drawers and cupboard space (again covered in laminex) along with a display area to the centre of the piece with a glass shelf/2 glass sliding doors.

Now lets face it, the piece is pretty ugly……that pink/salmon laminex along with that darkish stained timber…ugh. The sideboard though had great dimensions along with those awesome splayed legs that flow so smoothly into the bottom support. The ‘bones’ were good, and in this situation that’s all that matters.

First up the laminex top, drawers, and door were removed along with the drawer runners and cupboard space shelf. This left a few gaping holes to fill. We decided the best way to achieve the ‘beachie & light’ style we were after was to go with a pine plywood. It does bring an ‘industrial’ style feel along so we decided to go with exposed/countersunk screw heads also.

Once the majority of the frame work was completed the original timber veneer sides/solid timber base were sanded to remove the 60+ year old shellac and the accompanying dark timber stain underneath. The masonite backs were lightly scuffed and primed in white undercoat.

The plan is to varnish all the exposed timber (cuts down on ongoing maintenance – holiday home) whilst painting the masonite backs in a vivid white paint to not only add to the ‘light’ feel of the piece, but to contrast nicely against the the wide flowing pine plywood grain and the tight maple veneer grain.

Mid Century Sideboard

Definitely looking forward to seeing the finished product. Stay tuned.
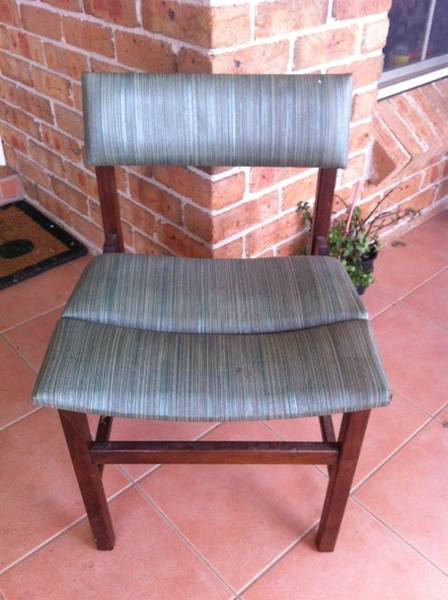
Warwick Library Chair

How awesome is this chair? And its story is just as good!

Mid Century Industrial Chair

I purchased it from an old couple a few weeks back. They were moving into a retirement village and no longer had a need for the chair. The couple told me of how they were married in the 1960’s and upon moving out into their own home they needed some lounge chairs. Unfortunately money was tight and all they could afford from the local second hand dealer was a pair of the above chairs that were originally from the Warwick public library in Queensland. As time went on the chairs were moved from the lounge room into the bedroom for use as a ‘bedroom chair’. When quizzed on the other chair I was informed that quite a few years ago the steam bent plywood back had cracked and it was disposed of…………..

Never mind though, one is better none! And the story to go with it adds that nice, personal touch, to know where it came from and why it was used.

Plans?  I’m thinking I’ll restore it, may be a few weeks/months until I get around to it however I definitely think it’ll be worth it!

Jens Risom Table & 6 Chairs

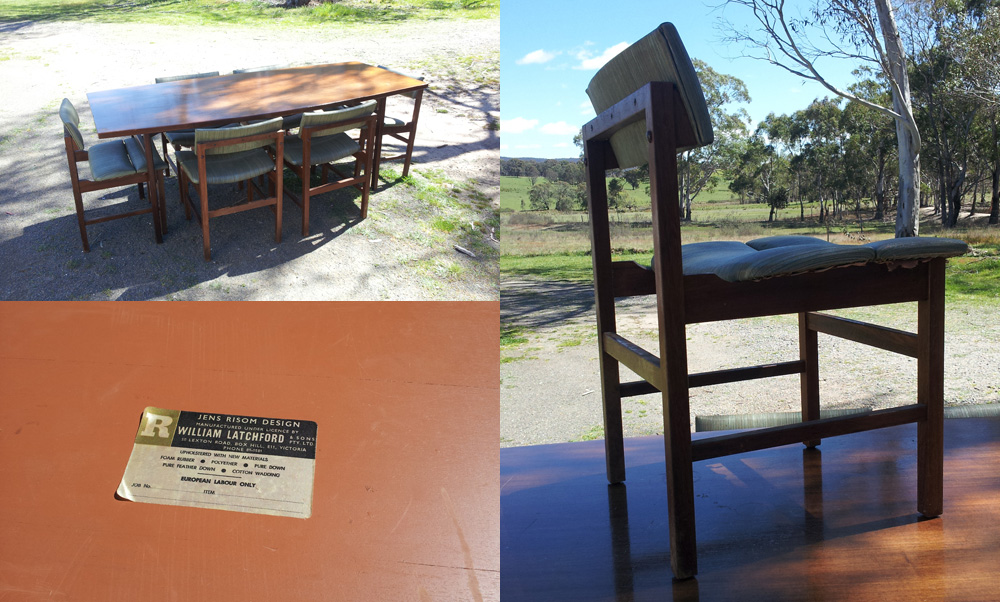
I was lucky enough to come across an amazing Jens Risom design table a few months ago.

Mid Century Table Dining/Board Room

Manufactured from blackwood the table has a great shape (which is a little hard to see in the above photo) which instantly caught my eye. Funnily enough the store I brought it from was only 100 meters away from a very well known and large antique centre. I often wonder how many ‘dealers’ walked past this piece without ever bating an eyelid at it………

Anyway, I have been storing it away until I get the chance to completely restore it. Fast forward to the end of last week and I stumbled across 6 chairs for sale.

Retro Dining Chairs

They looked OK in the pictures, not great, however well worth a look.

Upon further inspection they turned out to be exactly what I was after. They are manufactured from the same timber, being blackwood, have the same squarish design as the base of the Jens Risom table along with a complimenting curved back support.

The use of blackwood, brass head screws for those that are exposed along with the interesting split seat design all point to these chairs being manufactured by a high quality furniture producer, possibly around the mid to late 1950’s.

Full of excitement I couldn’t wait to put the chairs with the table and see if they would match…….

Mid Century Blackwood Dining Suite

And they did, perfectly!

It may be a few months until I get the time to restore this suite to its original state, however the wait will definitely be worth it. Stay tuned for more updates.

Meadmore Style Outdoor Garden Chairs

I spotted these Meadmore style outdoor garden chairs just around the corner from our home a few weeks ago. I was surprised that I had never noticed them before, especially considering how many times I’ve walked by with the dog.

Vintage outdoor garden chairs

After a few failed attempts in making contact with the owner, I was finally able to purchase these awesome designed chairs.

After sitting outside for the last 20-30 years they are a little worse for wear, however structually they are in great condition. The frames of the chairs are manufactured from 1/2 inch steel rod which had been plastic wrapped for protection. They do possess an interesting feature being the arm rests/supports that wrap around the back of the chair. The seat & back support are also manufactured from steel rod/wire (being a thinner gauge).

I’m really looking forward to stripping these back, and then hitting them with a really bright colour. Possibly a Chrome Yellow, or a Burnt Orange! They definitely have the potential to be the centre piece in any vintage/industrial/retro inspired space!